Design aspirations know no budget but your bank account does! That is why I have decided to start posting some of my favorite DYI projects that can help you satiate your need for change without you having to spend your last dime. Need not be put off!
The first DYI is one I found many years ago. My mother wanted new granite countertops in the kitchen but couldn’t afford so I tried this out on her laminate! Before your begin I suggest trying out different techniques on a piece of project paper (you know the kinds kids use for school presentations) this way if you don’t like your colors you didn’t risk everything.I guess that what I’ve been doing other people have thought of as well so if your a visual learner here’s a CBS video I found that shows you the basic process. Take a look!
http://www.cbsnews.com/video/watch/?id=5239293n
Materials Needed:
Faux granite kit or
Three paint colors ( I used cream, brown, and lighter warmer brown)
Polyurethane
Primer
Paint roller
Foam brush
Old towel
Sponges (different textures)
Work or rubber gloves
Masking tape
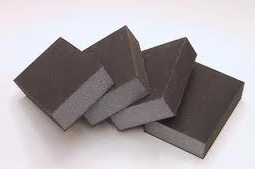
Fine-grit sandpaper
Wood or plastic filler
Prep Work: Tape off any surfaces.
1) Sand down the surface. The purpose of this is to take of any protective layer on the formica or laminate. Second is to provide track for the primer to grip.
2) Wipe clean of dust. You don’t want weird clumps in your final product.
3) Prime. Use the larger brush or roller. You can use any multi-purpose primer and if there are any minor damages (we had a burn mark that left a dent) just fill it in with the plastic filler or coats of primer and sand down to even out surface. Now let it dry!
4) Sponge on color from lightest to darkest, occasionally going back over with a lighter color. Use separate sponges for each color. Let it dry.
Tip: Decide on the look your going for by referencing a picture or going to Lowes or Home Depot and taking a sample back with you. While I recommend using more spontaneous gestures to create a natural look, this reference will help you keep on track.
5) 3-4 coats of polyurethane.
6) Sand again to smoothen.

 2 egg whites